From Pain to Power: How I Prepared for and Recovered from Spinal Fusion Surgery
Jul 14, 2025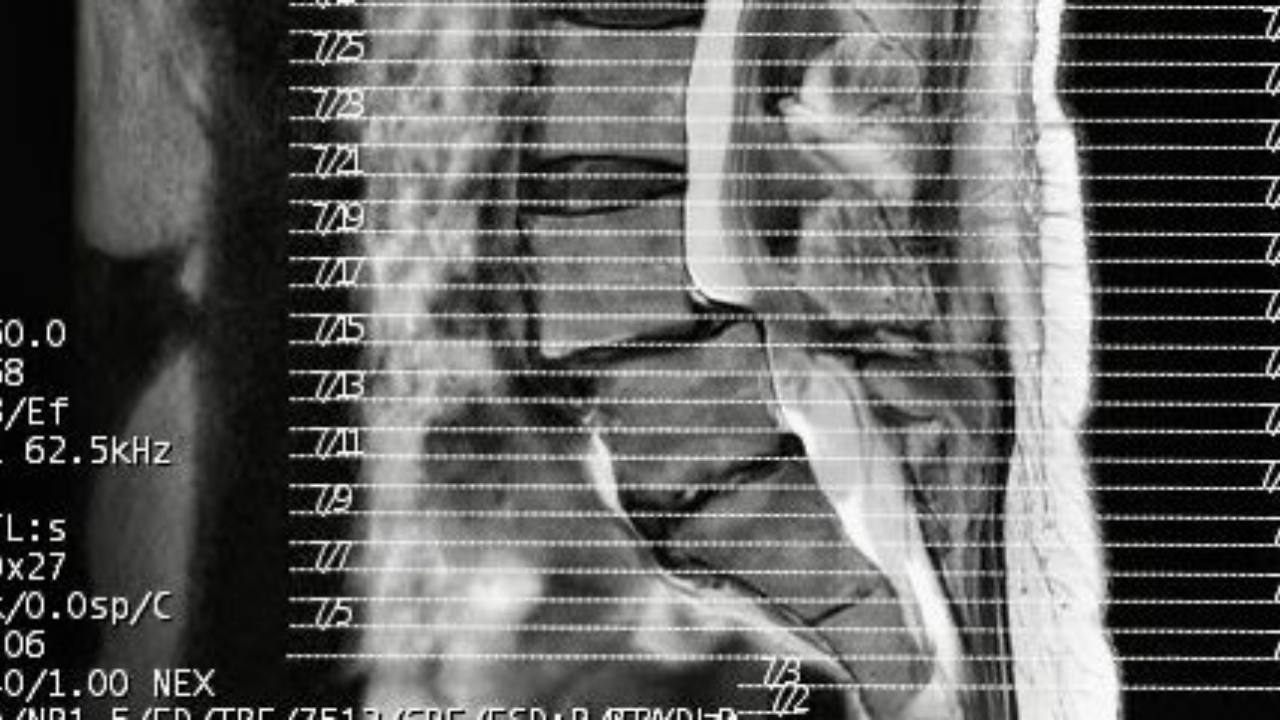
From Pain to Power: How I Prepared for and Recovered from Spinal Fusion Surgery
By Dvora Citron, RN, MS, NBC-HWC
🧭 My WHY: Why I Said Yes to Spinal Surgery
This surgery wasn’t just about fixing a part of my back — it was about reclaiming my life. I chose spinal fusion because I want to keep living fully — walking around the Lafayette Reservoir and stand-up paddle boarding in Sausalito, exploring new places with my husband and friends, active grand-parenting, practicing yoga and pilates, riding my Peloton bike, pursuing my hobbies and passions, and moving towards a successful professional venture in building a successful health coaching practice that empowers vibrant women to prioritize their own well-being.
I made this decision grounded in the same WHY that drives everything I do: to live with vitality, grace, and purpose. My goal was not just to eliminate pain, but to optimize my function for the long run — to protect my spinal cord and nerves, reduce instability, and stay active, healthy, and independent for decades to come.
📝 Part 1: What Led Me to Spinal Surgery and How I Chose My Path
When I scheduled spinal fusion surgery for July 2, 2025, it wasn’t an emergency decision. But it was a deeply considered one. After years of back pain, a previous surgery, and a growing awareness that something wasn't right, I found myself facing a new phase of my health journey.
I was diagnosed with lumbar spondylosis with stenosis, spondylolisthesis, and spinal instability, status post a prior lumbar surgery I had back in 2012. That first surgery, a partial laminotomy and facetectomy, gave me relief for a time. But over the last year or so, I developed persistent right-sided radiculopathy — nerve pain and muscle weakness that made it difficult to lift my right quad. I'd noticed a difference between my left and right sides for a while. But the red flags came up during our trip to Alaska last year, when I had so much trouble on our hikes — even though the conditions were swampy and I was wearing heavy knee-high boots — that I could barely finish them. For at least the past year, I had to lift my right leg with my hands just to get into the car.
Despite my best efforts with physical therapy, strength training, and all the tools I know as a nurse and coach, the problem wasn’t improving. I eventually consulted with my hip surgeon (since I’ve had both hips replaced — my left in 2014 and my right in 2020), and he confirmed: this wasn’t a hip issue. It was spinal.
I saw my trusted physiatrist, Dr. Michael Park, who had previously done a dozen epidural steroid injections for me. This time, the MRI showed that injections wouldn’t be enough. It was time for something more definitive.
I got two surgical consults. The first, at UCSF, proposed a complex multi-level fusion (L4-L5-S1) with both anterior and posterior approaches, followed by a week-long hospital stay and two weeks of inpatient rehab. It felt like a lot. Too much.
🧐 The Power of a Second Opinion
Thanks to a colleague's canceled appointment, I was able to see Dr. Jeffrey Randall at Eden Medical Center sooner than later. Dr. Randall requires that you send your records to him to review in advance. It's reassuring to know that if he agrees to a consult with you, he's already familiar with your case and feels like he has a valuable treatment plan in mind. Additionally, my husband has known Dr. Randall for years, and a close personal friend — also a physician — had the same surgery with him just a year earlier and had a great outcome. That gave me extra reassurance.
This second consult felt different. Dr. Randall proposed a focused L4-L5 posterior spinal fusion using advanced imaging guidance through the Medtronic O-arm Surgical Imaging System with overnight hospitalization and walking as the primary rehab, explaining that I could expect the same outcome with this minimally invasive approach — and a much shorter hospital stay. That approach aligned with how my own healthcare practice and how I live: focused, efficient, and empowering. And no anterior entry? I made my decision.
🏥 What Is Spinal Fusion Surgery?
Spinal fusion is a surgical procedure that connects two or more vertebrae to improve stability, correct a deformity, or reduce pain. In my case, the fusion was performed between L4–L5, using titanium screws and rods to stabilize the vertebrae. Over time, the bone graft used in surgery will grow and fuse the two vertebrae together permanently.
🧠 Why the Medtronic O-arm?
The Medtronic O-arm is an intra-operative imaging system that provides real-time, 3D images during surgery. This allows the surgical team to place screws and implants with exceptional accuracy and reduce the risk of complications. For me, this meant a more precise surgery with the added reassurance that each step was visually confirmed before completing the procedure. The technology integrates with surgical navigation to guide the surgeon in real time — think GPS for your spine. This system helps the surgeon visualize exactly where to place hardware, ensuring precision, efficiency, and safety. As someone who values evidence-based practice, this gave me peace of mind. It also helped reduce surgical time, which can aid in recovery.
I scheduled my surgery for early July — after my retirement from my 25 year school nursing career and our 16-day trip to New York — and early enough in the summer to recover with good weather and eventually enjoy our pool.
📝 Part 2: Preparing for Spinal Surgery — From Pre-Op to Packing Lists
I have a lot of experience with surgery — both as a patient and a nurse. I know how important it is to be healthy, strong, and fit going into surgery — not only for the procedure itself but, more importantly, for your recovery.
As in the past, in addition to optimal nutrition, I made sure to stay as active as possible with walking, strength training, Pilates, and even swimming. A positive mindset is key for healing, so I practiced mindfulness and focused on cultivating emotional balance. That said, even with 39 years of nursing experience, this surgery taught me new things. You can prepare all you want, and there will still be surprises.
🍏 Apple Juice Before Anesthesia
The pre-op team instructed me to drink at least 8 ounces of apple juice the morning of surgery — not what I expected! Traditionally, patients are told to be NPO (nothing by mouth) for 12 hours before surgery. But newer research supports a bit of carbohydrate-rich fluid — like juice or Gatorade — to help improve outcomes and reduce anesthesia side effects.
It felt strange after years of following strict NPO rules, but I trusted the science and drank the juice.
🧼 Triple Antiseptic Wipe-Down
Instead of using Hibiclens soap to shower the night before surgery (like I’ve done for previous procedures), I was given two packets of antiseptic body wipes:
-
One for the night before surgery
-
One for the morning of surgery (before leaving for the hospital)
These wipes were effective but left my skin sticky and itchy — I was so uncomfortable! I had to ask my husband to help apply them to the hard-to-reach areas. It wasn’t pleasant, but it was essential for infection prevention.
Then, to my surprise (and not exactly my delight), the pre-op nurse handed me a third packet to use at the hospital, and also swabbed my nostrils as part of their MRSA prevention protocol. Thorough, to say the least!
💅 Nail Care — Don’t Skip This!
A small but important detail: do your manicure and pedicure before surgery. If you have it done at a salon, ask for no nail polish. Here’s why:
-
Clear nail beds help anesthesiologists and nurses assess circulation and oxygenation.
-
You won’t be able to reach your toes for a while afterward — trust me on this!
I’m glad I did this ahead of time — it made everything easier.
🧳 What I Packed (and What I Didn’t)
Here’s what I brought — and what I learned I didn’t need — during my hospital stay:
✅ Do Bring:
-
Essential medications
I brought my daily osteoporosis injection (Tymlos) and my HRT (Duavee), knowing the hospital might not have them. Be sure to inform the intake nurse and pharmacy. The anesthesiologist instructed me to skip my Tymlos the morning of surgery. -
A supportive loved one
Most important of all! My husband stayed with me — helping me with everything from getting out of bed to the restroom to asking for ice packs and water, advocating for me, getting food (Chipotle!), and offering comfort. It’s hard to get a nurse’s attention overnight, so having someone with you matters. Most hospitals have private rooms now with some type of sleeping accommodations for your support person. -
Snacks or meals
The hospital provided some vegan options, but not enough for me. Eric brought in dinner from Chipotle for us, which made a huge difference. -
Discharge clothes
I brought a comfy t-shirt dress, underwear, and sandals. -
Slip-on shoes with arch support
The hospital socks were enormous on me — the grippy bottoms were helpful, but I preferred my Teva slip-on sandals at home. -
Reliable ice packs
The hospital ice packs were bulky and not well-sealed. One leaked on me in the middle of the night! Tip: Ask that your ice packs not be over-filled—with ice or with air.
🚫 Skip Bringing:
-
Jewelry or piercings — You cannot wear them during surgery, so leave them safely at home.
-
Pajamas or your own hospital clothes — With IVs, monitors, and a post-op drain, hospital gowns are simply more practical.
🧠 Mental Preparation
Preparing mentally and emotionally is just as important as physical prep. Before surgery, I:
-
Set up a comfortable recovery space at home
-
Prepped plant-based meals in advance
-
Postponed visitors and gave myself permission to rest
-
Arranged for help with errands and housework (if you can get housekeeping support, this is a great time!)
And most importantly — I reminded myself to accept help and show myself grace. Recovery isn’t just physical. It’s emotional too.
👨🏼⚕️ Part 3: The Surgery — What Was Done and Why It Mattered
If you’re researching spinal fusion surgery — or just curious about the details — here’s what my procedure included. While some of the terminology is medical, I want to share it for anyone exploring this path or supporting a loved one through it.
I had a posterior lumbar inter-body fusion (PLIF) at L4–L5, with hardware placed for stability and bone grafting to support fusion. Here's a breakdown of the surgical steps:
✅ What My Spinal Fusion Surgery Included
-
Posterior and interbody fusion at L4-L5
→ This means stabilizing the spine from both the back (posterior) and between the vertebrae (interbody). -
Pedicle screw and rod fixation (L4, L5)
→ These implants help hold the spine in position while the bone fuses. -
Laminotomy and decompression
→ Part of the bone (lamina) was removed to relieve pressure on the nerves — a re-exploration of an area already operated on in the past. -
Placement of a prosthetic inter-body device
→ A spacer (or “cage”) was placed between the vertebrae where the damaged disc used to be. This restores height (LOL) and allows fusion to occur. -
Image-guided navigation
→ This advanced technology, the Medtronic O-Arm, allows the surgeon to see a real-time, 3D view of the spine for extremely precise placement of screws and devices. -
Use of morselized local autograft bone
→ Small bone pieces taken from my own spine during the surgery were reused to support fusion. -
Use of allograft bone putty
→ Donor bone material was added to help with healing and bone fusion.
💬 Post-Op Outcome and Confirmation
After the surgery, Dr. Randall told me: “Your nerve was totally compressed and your vertebrae unstable.”
He confirmed what I had suspected for months — that I had made the right decision to go ahead with this surgery. He also shared that the surgery went as well as it possibly could have.
That news, combined with the relief of finally having a path forward, made all the difference. It supported my positive mindset, which I truly believe is a cornerstone of recovery.
❤️🩹Part 4: Recovery at Home — Tools, Food, and Boundaries That Helped Me Heal
❄️ Support at Home
You’ll need someone with you 24/7 for the first few days. You won’t be allowed to bend, lift, or twist (No BLT), and everyday tasks like getting into bed or using the bathroom are tough. Ask friends or hire help if needed.
A hospital social worker will confirm that you have a plan in place before discharge.
💊 Supplies and Equipment
-
Oral care tray and basin (take them home!)
-
Reusable ice packs—see below.
-
Extra pillowcases for wrapping ice packs
-
Medications (prescriptions and OTCs like Tylenol): Your doctor's office should provide you with any prescriptions to fill in advance. Make sure you have a few weeks supply of any other medications you take regularly. Definitely have some Tylenol on hand!
❄️ The Ice Packs I Swear By
Years ago, I purchased industrial gel ice packs from a physical therapist. They’ve come in handy more times than I can count. I keep one in a pillowcase, rotating it from freezer to use several times a day. Specifically, I use the Body Ice icepacks, which have proven superior and reusable for years: Body Ice packs
👟 Footwear That Works Post-Op
During my post-op walking rehab, I’ve been using the Hurricane Ampsole Metallic Sandal by Teva. I wear orthotics, but I can almost always wear Naot and Teva shoes without them — they have excellent arch support. The velcro straps also make it easier to put them on independently, which I haven’t quite been able to do with my athletic shoes yet.
🪥 Oral and Facial Care
Standing oral hygiene worked with the hospital basin. For face washing, I used washcloths and kept towels within reach. No bending!
🛁 Showering and Incision Care
You’ll leave with a bandage over steri-strips. I also had a smaller incision from the Medtronic O-Arm. I was allowed to shower on post-op day 3. After the outer bandage came off, I patted the site dry.
My skin reacted to adhesive, so my husband applied hydrocortisone cream (check with your surgeon first). The steri-strips had completely fallen off by day 13, I began to use CeraVe Healing Ointment at two weeks post-op to help heal the scar.
🚶 Walking Is the Rehab
No formal PT until after my first post-op appointment next week. Just walking. I started with a few short walks a day and built up to several one-mile walks by Day 12. I track everything on my Apple Watch, which keeps me motivated.
🥦 A Plant-Based Diet That Fuels Healing
My plant-based lifestyle supports every stage of this journey:
-
Nutrient-dense meals reduced inflammation
-
Fiber-rich foods kept my digestion on track
-
Whole foods to fuel my body including fresh fruits and veggies, and plant-based meals and snacks. Forks Over Knives is one of my favorites sources of healthy recipe ideas.
-
Avoid ultra-processed foods and snacks, and high-caloric "treats"
- I love having my Prolon L-Protein drink every so often. It's easy to mix-up on it's own, but even better blended with frozen fruit and a few servings of spinach or kale for a nutrient-dense fiber-filled smoothie.
- 💧Hydration! Make sure to drink plenty of water.
💧 Gut Health Support
Surgery and anesthesia affect digestion. My surgeon recommended Colace and Miralax. I prioritized fiber-rich foods, water, and movement to support my microbiome.
😴 The Role of Sleep and the Hospital Experience
Being in the hospital the first few days post-op was helpful for a few key reasons:
-
Pain medication management
-
An adjustable bed to support comfortable rest
-
Access to immediate medical care
-
Monitoring post-op issues — for example, my surgeon had to clear out scar tissue from my 2012 surgery and placed a drain to manage fluid. You can’t go home until that’s removed safely and healing is confirmed.
All that being said, there's nothing like getting home to your own bed. I already sleep with multiple pillows so I had plenty of those available. Plus (as I've shared), I've had back surgery and two total hip replacements -- this ain't my first rodeo!
Before discharge, OT and PT evaluated my safety at home — managing stairs, getting dressed, and mobility. I’ll share more in a follow-up post about my post-op appointment and PT progress.
💬 Bonus: How to Support Someone After Surgery
As a hospital nurse, I used to quietly bristle when visitors parked themselves in patient rooms--especially my post-partum patients. I had so much to teach them about self-care and baby care. Patients are in the hospital to recover, not to host. And now that I’m on the receiving end, I get it even more.
I’ve postponed and declined several visits. Not because I’m not grateful, but because I want to use my energy to heal. I’ll have time for socializing later. As I said above, recovery and healing is about energy management, which takes awareness (check in with yourself regularly) and the discipline of pacing yourself.
Here’s how you can help someone recovering:
-
Check in gently: Text or call to ask how they’re doing or if they need anything.
-
Offer food — but keep it healthy: Think veggie bowls, soup kits, or fresh fruit.
-
Don’t assume you’ll stay: Drop off and go. Let them eat in peace.
-
Keep visits short: 30–60 minutes, max. Let them lead if they want more time.
🌿 In Closing
Spinal fusion surgery has taught me about pacing, resilience, and the wisdom of anticipation and planning. I'm recovering well, thanks to the thoughtful care I gave myself before, during, and after surgery. I'm particularly grateful to my loving husband for all his care and support.
If you or someone you love is preparing for surgery, I hope this blog post helps you feel more informed, empowered, and at peace.
Coming soon: Foods, Meals and Plant-Based Recipes That Supported My Recovery.
Disclaimer:
The information shared on my website, and in all related content is for educational and informational purposes only. It is not intended as medical advice or a substitute for professional care. Please consult with your own healthcare provider before making any changes to your diet, lifestyle, or health practices.
As a Registered Nurse and Board-Certified Health & Wellness Coach, I offer guidance rooted in evidence-based practices, but I do not diagnose, treat, or prescribe. Each person’s health journey is unique—please work with your own licensed provider for personalized support.
💌 Stay Connected and Inspired
If you found this post helpful, I’d love to have you in my community! I send out a weekly Friday Fun newsletter filled with personal updates, plant-based recipes, wellness tips, and behind-the-scenes insights from my journey as a health coach and vibrant woman in her 60s.
👉 Sign up here to receive my free newsletter + get early access to new posts, resources, and events: SIGN ME UP
Let’s keep living fully, healing intentionally, and aging vibrantly—together.
Ready for a Deeper Experience?
If you’re a woman 50+ who wants structured support, thoughtful coaching, and real momentum, the Sexy in Your 60s Coaching Experience is now open.
You can learn more about the program here — or join my email list to receive reflections and podcast updates along the way.
Author

About Dvora Citron
I'm a Registered Nurse with 40+ years of experience, a National Board Certified Health and Wellness Coach, and the founder of Slant2Plants® — a plant-forward approach to vibrant living, healthy aging, and feeling fully alive in your 60s and beyond.
I write, teach, and coach women over 50 who are ready to nourish their bodies, reclaim their energy, and step into the most confident chapter of their lives.
🎙️ Listen to the Sexy in Your 60s™ podcast — interviews with women and experts on healthy aging, longevity, and what it truly means to feel grounded, confident, and at home in your life after 50.
📅 Ready to go deeper? Book a free Health Coaching Discovery Call
